Placing experience on Campaign Image

Help Center/Placing experience on Campaign Image
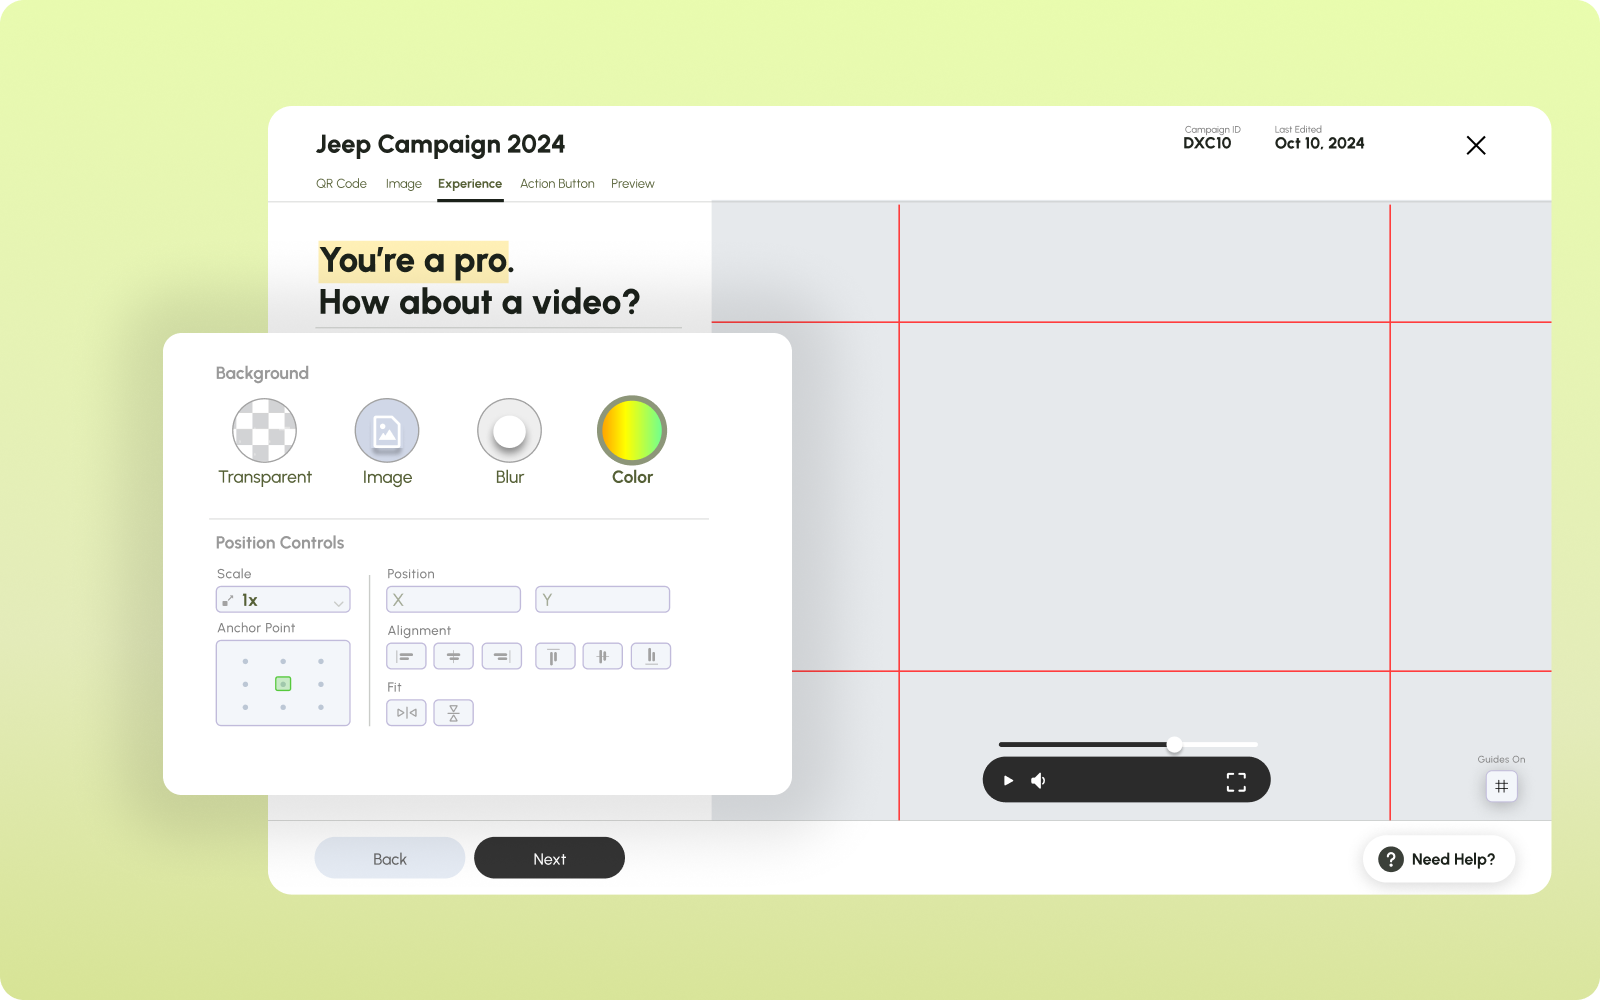
We’ve provided you with the flexibility to fully customise your Flam experience, ensuring that every detail aligns perfectly with your vision.
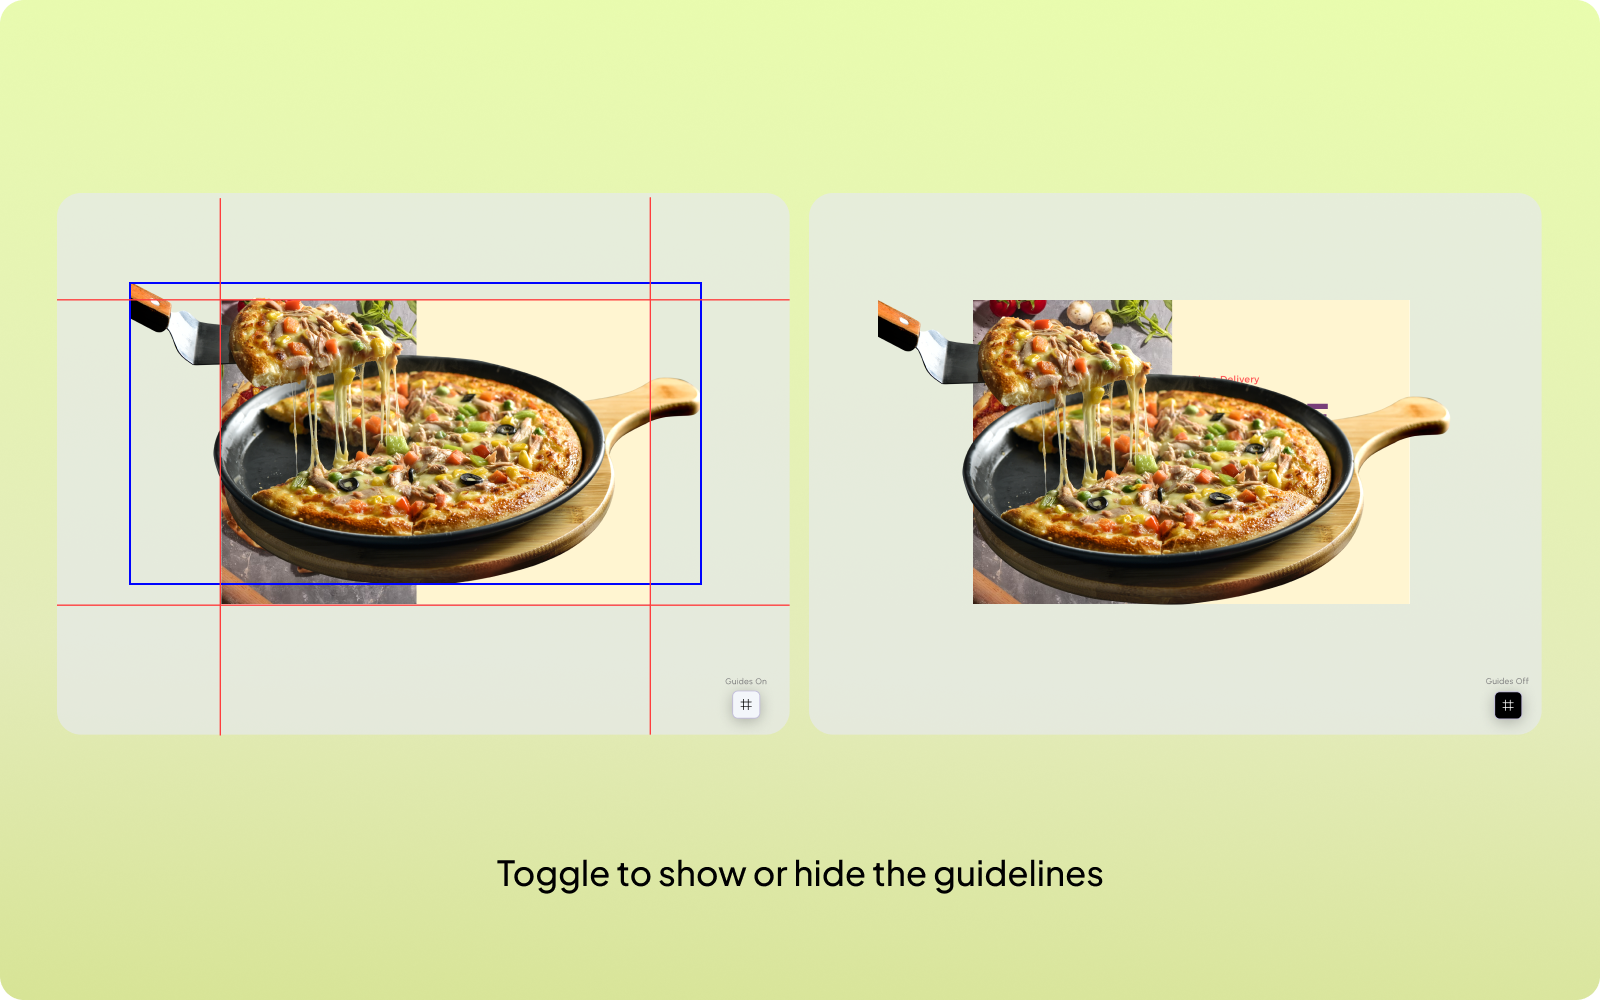
Guides
Toggle the guides to help you in placing the experience precisely.
- Red lines show boundaries of campaign image.
- Blue bounding box highlight the experience boundaries.
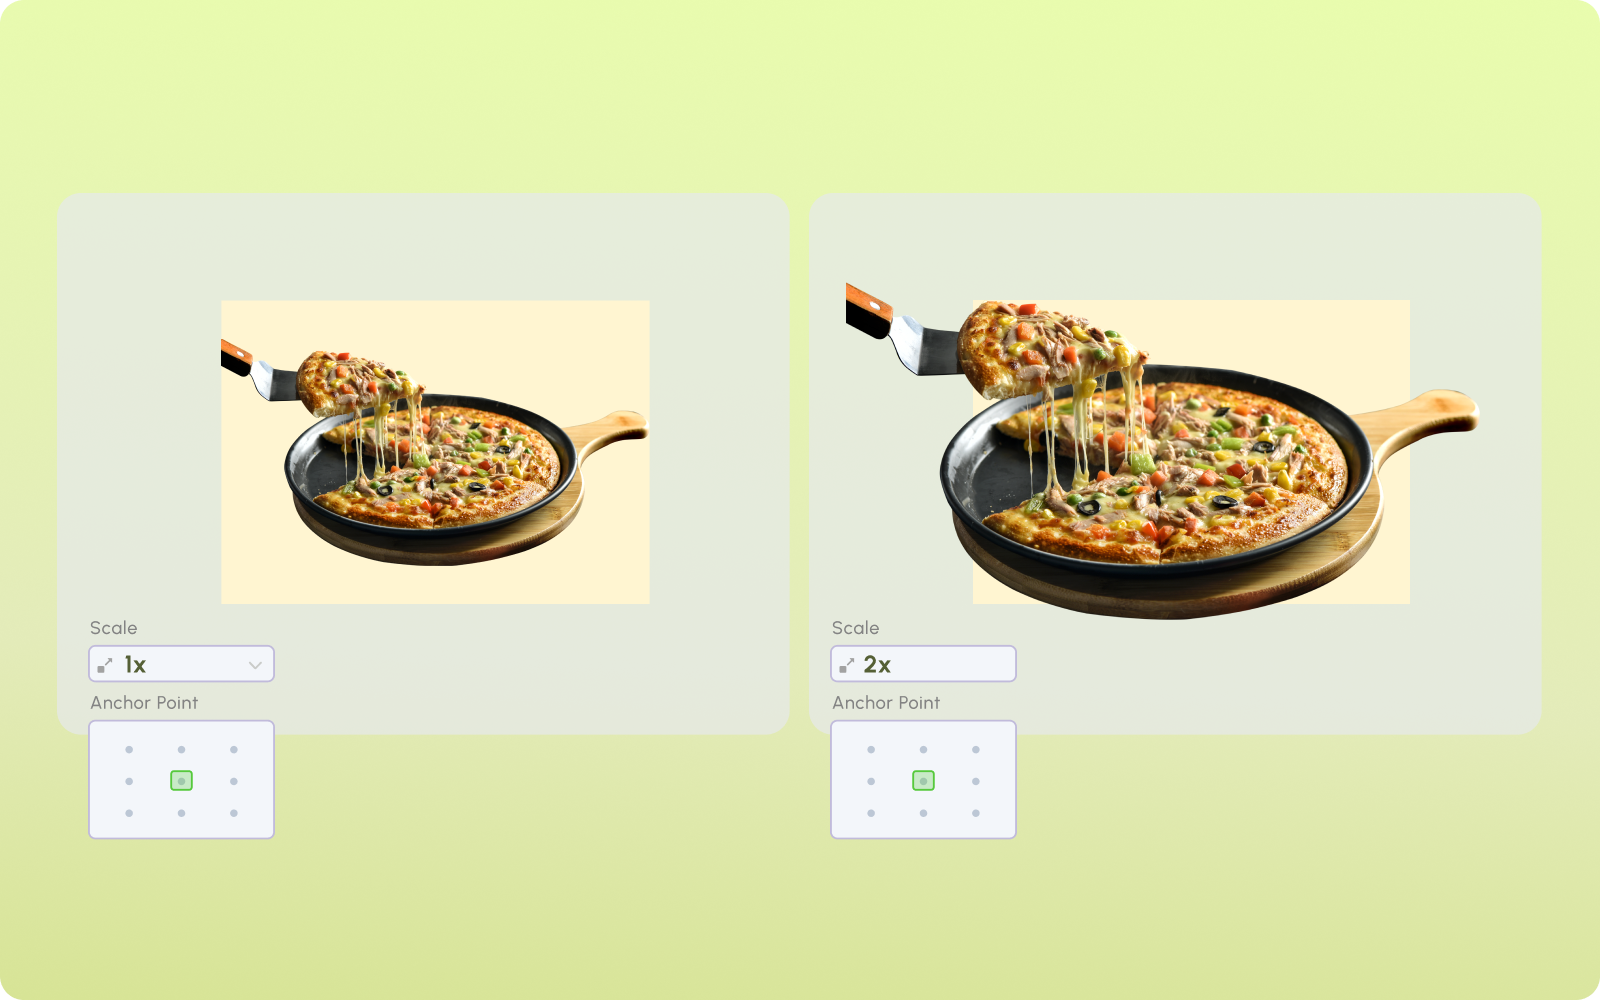
Scale
You can resize your experience to make it larger or smaller with respect to the campaign image.
- Use the anchor point to decide where you want to scale your experience.
- The scale is based on the width of the campaign image. If the scale is 1, the width of the experience will be equal to the width of the campaign image.
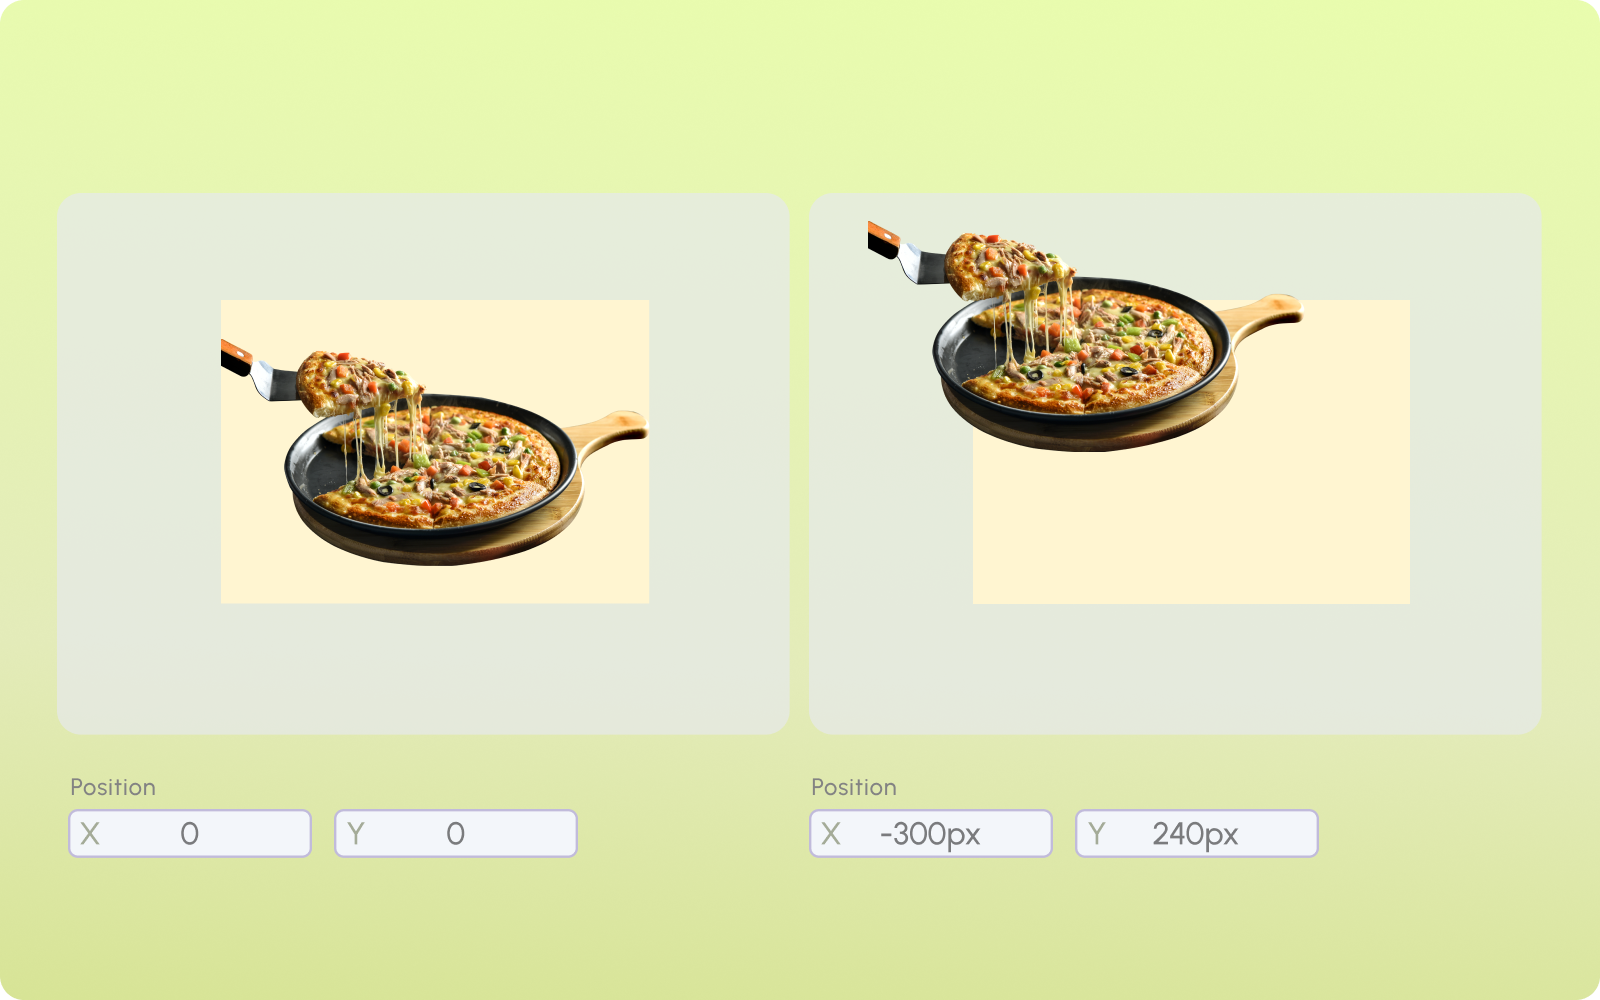
Position
Adjust the placement of your experience relative to the trigger image.
- Use X for moving experience left or right from centre of the campaign image.
- Use Y for moving experience top or bottom from centre of the campaign image.
- You can provide values in pixels or percentages.
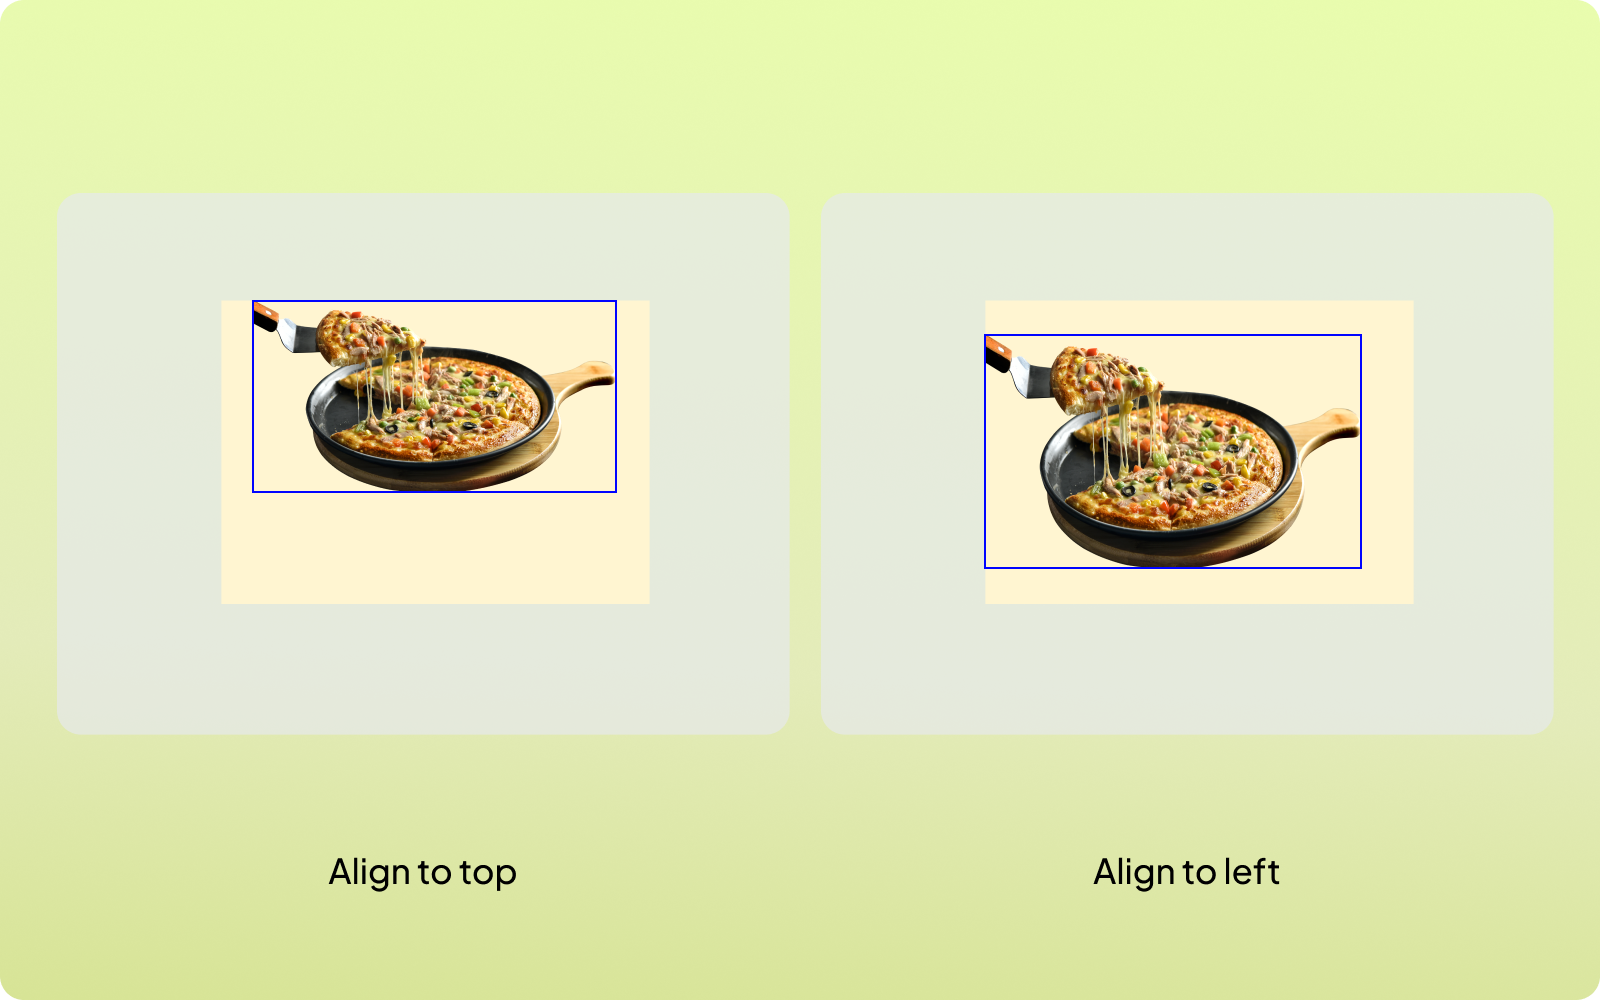
Alignment
Alignment automatically adjusts position, ensuring the video is properly aligned with the campaign image:
- Choose predefined alignment settings to save time. You can align experience with top, bottom, middle, left, right or centre with respect to campaign image.
- Eliminates manual calculations for a precise and accurate experience.
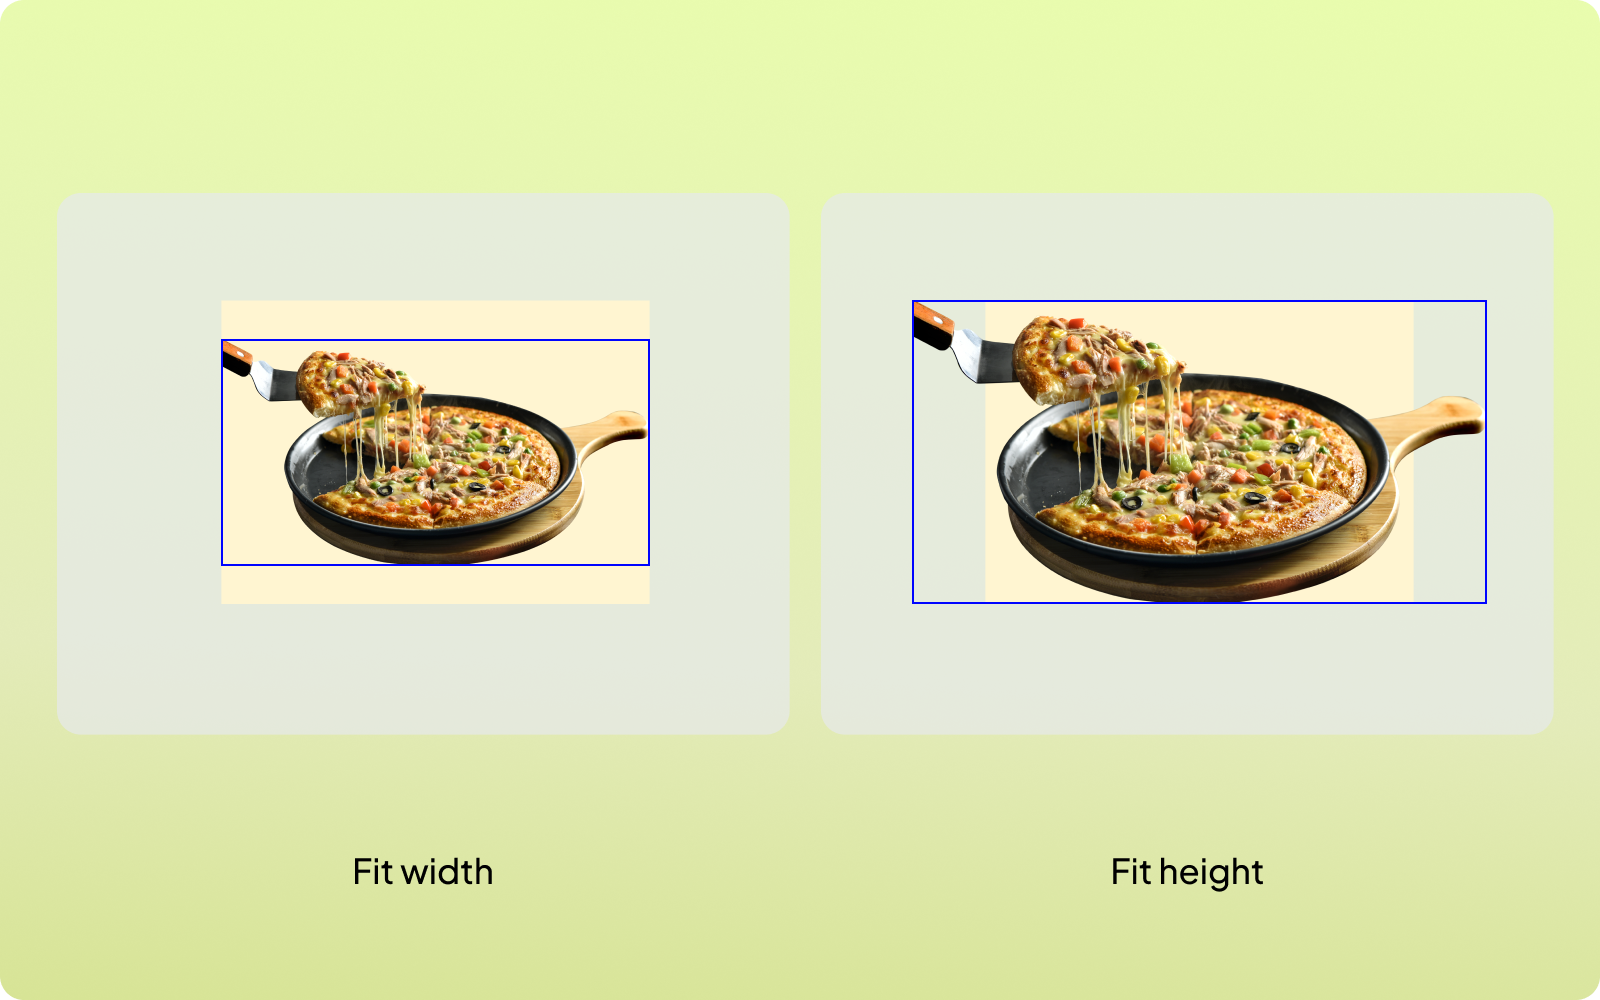
Fit
Fit automatically adjusts scale & position, ensuring the experience is properly fit to the campaign image:
- Fit to width: Experience is scaled to fit the width of campaign image and aligned to middle.
- Fit to height: Experience is scaled to fit the height of campaign image and aligned to centre.
Background
The background defines the visible area of the campaign image when your experience is smaller than this. There are multiple customisation options, allowing you to personalise the look and feel of your experience:
- Transparent - The background remains fully transparent, the campaign image will be visible where experience is not overlaid.
- Image - Add a custom background image to overlay the campaign image. It will show up in area not covered by the experience. Use these add your logo, key message etc. with brand colours.
- Blur - Apply a blur effect to the visible part of the trigger image. Helps create a cinematic focus on your experience.
- Colour - Fill the visible area with a solid colour of your choice. Helps in branding or maintaining a consistent aesthetic.